I’m still getting to know the Divi Visual Builder but already, one of the features that I’ve fallen in love with is the Editing History panel.
The Editing History panel is part of the Page Settings and it shows a list of all your editing actions for that particular session.
It has settings, which allow you to undo and redo or you can scroll up and down your editing history and jump directly to a particular point in time.
The default WordPress dashboard doesn’t allow you to easily move forwards and backwards in your editing history, so I for one welcome this great feature.
In this post, I’ll show you how to access the Editing History panel via the page settings and run through the various ways you can use it to undo, redo and jump around in your editing history.
My Affiliate Links Disclosure
Hi everyone. Just to let you know that many of the links on this site are my affiliate links. What that means is that if you click one of them and buy something… I get a commission. It doesn’t cost you anything extra and I only recommend things that I’ve tried and tested, so please, please, please… use my links.
An overview of the Editing History panel
This short video by Nick Roach of Elegant Themes, was released as part of the sneak peek series of videos leading up to the release of Divi 3.0 with its Visual Builder.
There is no commentary on the video but it still gives a great overview of the Editing History panel.
So what is the Editing History panel
The Editing History panel is a panel, which appears on your page when you are editing using the Visual Builder.
It allows you to run up and down your editing history, for that particular session, and choose particular points in time.
As soon as you choose a particular point in time, the page is displayed as it appeared at that time and you can choose to save your page as it appeared then or pick another point in time.
It’s your very own time machine and it’s all done… with just a few mouse clicks.
Accessing the Editing History panel
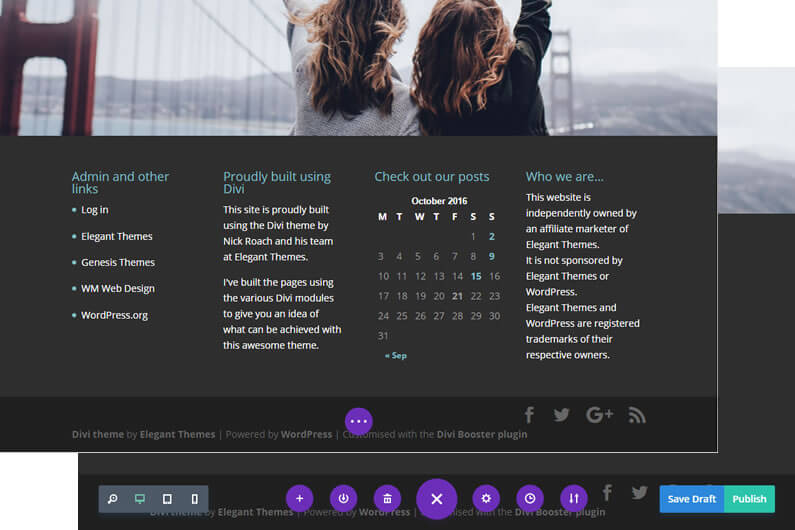
The Editing History panel is one of the page settings, which is accessed via the purple icon, which appears at the bottom of the page when you are editing in Visual Builder mode.
Clicking the docked icon expands it to reveal six further icons as shown below:

The Editing History icon is the one second from the right, the one which looks like a clock face.
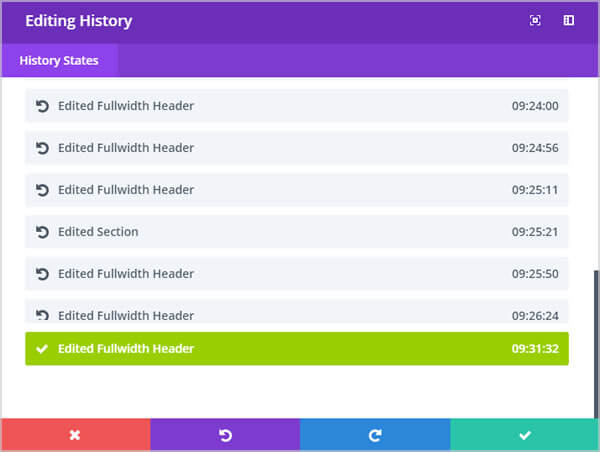
When you click it the Editing History panel appears on the page and you can drag the right-hand corner of the panel to increase or decrease its size.
At the beginning of your session the History panel will only have one History State, which will say “Loaded Page”. Additional History States will be added as you make further edits.

Try out the Editing History panel for yourself on the free Divi 3.0 demo site
If you don’t use the Divi theme and you’d like to follow along, you can try out the Editing History panel for yourself on the free Divi 3.0 demo site.
To get to the demo site just hit the big green button below:
Using the Editing History panel to undo, redo, delete and save
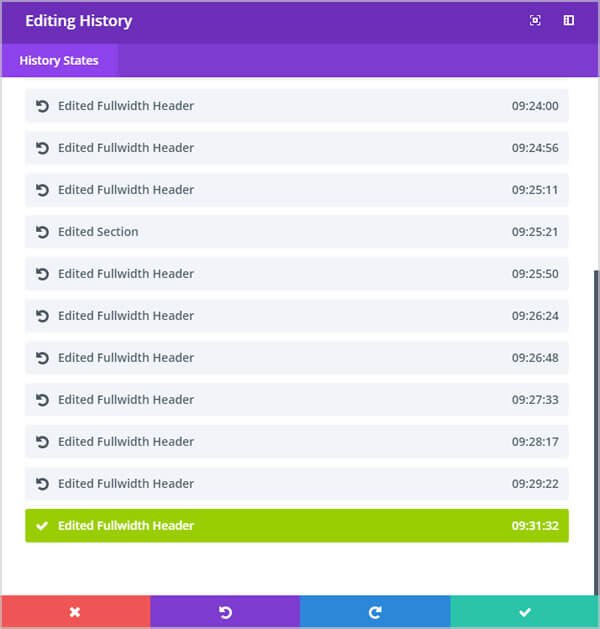
At the bottom of the History panel are four coloured bars, which have tool tips saying: Discard All Changes, Undo, Redo and Save Changes.
The “Undo” and “Redo” will take you backwards and forwards in your editing actions one step at a time and you can use “Undo”, “Redo” as many times as you like.
As you use “Undo” and “Redo” your page will update almost instantaneously… don’t you just love the Visual Builder.
The “Discard All Changes” will discard anything that you’ve done in that session – useful for when it all goes wrong and you’d like to go back to the beginning.
The “Save Changes” will save any changes that you’ve made to your editing actions using either “Undo”, “Redo” or the History States.

Using the Editing History panel to jump to a particular point in time – History States
As well as using the Editing History panel’s bottom toolbar, you can also click within the panel and choose particular “History States”.
History States are made up of a short description and a time showing when that particular edit was carried out.
They allow you to run up and down your editing history timeline and choose a particular point in time. As you choose that point, it will be displayed almost instantaneously on your page.
Once you are happy with your choice of History State you have to click the “Save Changes” icon on the bottom toolbar, to save the page as it was at that point in time.

One click control of your editing history with the Visual Builder Editing History panel
The Editing History panel is just one of the many features of the Visual Builder and I’m already wondering how I ever managed without it.
It’s quick, it’s intuitive and it allows you to experiment with your layouts, knowing that you can turn back the clock, with just one click.
The Future of WYSIWYG: When you make a change in the new visual builder, your page is updated instantly. Text on the page feels tangible as you slide the font size controls and watch your words expand and contract with each gesture.
The page feels alive as you explore the color picker and watch each glowing transformation.
If you’d like to swap “content creation” in the back-end of WordPress for “creative designing” on the actual pages of your website, then sign up with Elegant Themes and start using the Divi 3.0 Visual Builder today.
Take the Visual Builder for a free test drive and try out the Editing History panel
If you’re not a Divi user, you can still take the Visual Builder for a free test drive and try out the Editing History panel, by hitting the big green button below!

Create your WordPress masterpiece with Divi 3.0’s Visual Page Builder
Take The Divi 3.0 Visual Builder For A Free Test Drive and try out the Editing History panel
I hope that you enjoyed the post and that you are as excited about Divi 3.0’s front-end editing as I am.
If you have any thoughts about the Divi 3.0 Visual Builder in general or the Editing History panel in particular, then please leave a comment and if you’d like to spread the word about this fabulous On-Page theme, please use my social sharing icons below.
Credits:
My thanks and gratitude to Elegant Themes for the video and graphics used in this post.


