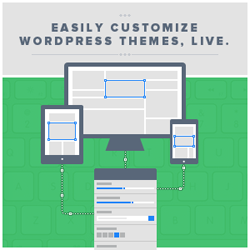
One of the great things about the Divi theme is that it has Modules to do just about anything… without using a plugin. That includes adding a subscribe / newsletter widget and connecting to your mailing list provider.
The Subscribe / Newsletter Module is one of over thirty Modules that come with Divi and in this post I’ll look at the various options available to set up and configure it.
At the moment the Module works with FeedBurner, MailChimp and AWeber, but don’t worry if you don’t use any of those because in the next Divi release, it’s going to work with lots more.
Growing your mailing list is easy using Divi’s newsletter signup module. This module supports MailChimp, AWeber and FeedBurner integration.
Setting up the Subscribe / Newsletter Module
The best way to learn how to use this Module is to watch this Elegant Themes video by Nick Roach.
This video is part of the Divi Theme Documentation, which include videos and text documents to cut down the Divi theme learning time and get you online quickly.
As you can see from the video, the setup process is in two parts:
#1 – use the Elegant Themes ePanel to connect your WordPress account with your mailing list provider. The Subscribe / Newsletter Module currently supports FeedBurner, MailChimp and AWeber.
#2 – create and configure your opt-in box using the Subscribe / Newsletter Module options.
Because these two operations are carried out in two different areas of your WordPress dashboard, I’ve covered them separately below.
Subscribe Form – the subscribe module now supports MailChimp, AWeber, and FeedBurner.
Connect your WordPress account with your mailing list provider via ePanel
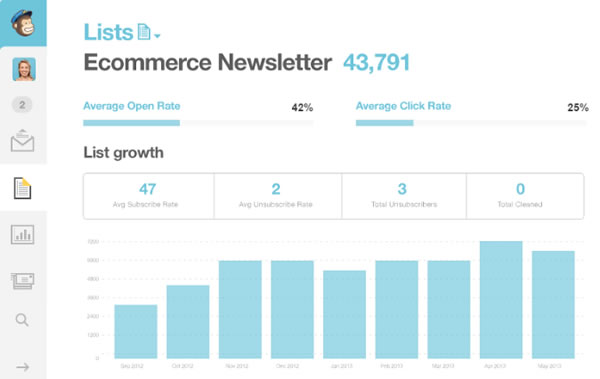
For MailChimp and AWeber this is where you add your API to make the connection with your list, but the connection process is slightly different for each. For FeedBurner you don’t have to do anything in this area.
- MailChimp – to connect your MailChimp account go to the Appearances > Divi Theme Options page in your WordPress Dashbord. Look for the “MailChimp API Key” setting and input your MailChimp API key and click “save.” Your account is now connected.
Here is some more info about how to find your API key. - AWeber – to connect your AWeber account go to the Appearances > Divi Theme Options page in ePanel and look for the “AWeber Authorization” setting. Click the “Generate authorize code” link to log into AWeber and retrieve your unique code.
Next, copy and paste the code into the ePanel settings box and then click the “Make a connection” button to confirm the connection and link your account. - FeedBurner – for FeedBurner you don’t have to make a connection in the ePanel area, all you have to do is type in your FeedBurner account name in the Signup Module Settings panel in the “Feed Title” box.
My Affiliate Links Disclosure
Hi everyone. Just to let you know that many of the links on this site are my affiliate links. What that means is that if you click one of them and buy something… I get a commision. It doesn’t cost you anything extra so I hope that you will use my links.
Create and configure your opt-in box using the Module Settings
After having made the connection with your mailing list provider you can create your optin form by placing the Subscribe / Newsletter Module in the column of your choice. In the video Nick puts his form beneath the Blog Module so that it will display beneath his list of blog posts.
Once you’ve added the Module you can configure your optin form using the following settings:
- Service Provider – choose which mailing list provider you are using. The module currently supports MailChimp, AWeber and FeedBurner integrations. Select your provider from the list.
- MailChimp Lists – if you selected MailChimp as your provider, then this option will appear. Here you can choose a MailChimp list to add subscribers to. If you don’t see any lists here, you need to make sure MailChimp API key is set in ePanel and you have at least one list on your MailChimp account. If you added new list, but it doesn’t appear here, activate ‘Regenerate MailChimp Lists’ option in ePanel. Don’t forget to disable it once the list has been regenerated.
- AWeber Lists – if you selected AWeber as your provider, then this option will appear. Here you can choose an AWeber list to add subscribers to. If you don’t see any lists here, you need to make sure AWeber is set up properly in ePanel and you have at least one list on your AWeber account. If you added new list, but it doesn’t appear here, activate ‘Regenerate AWeber Lists’ option in ePanel. Don’t forget to disable it once the list has been regenerated.
- FeedBurner Title – if you selected FeedBurner as your provider, then this option will appear. This is how you identify your FeedBurner account. You’ll need to enter your Feed Title, which can be found here.
- Title – specify the title that will be displayed on your signup form.
- Button Text – specify the signup button text.
- Background Colour – you can make your Signup tile any colour you wish by using the colour selector. Select the same colour as its section background to create the appearance of a full width or borderless effect.
- Text Colour – if the Background Colour is dark, the Text Colour should be set to ‘Light’ or vice versa.
- Text Orientation – specify the orientation of your text, Left Justified, Centered, or Right Justified.
- Content – enter the SignUp Module content.
- Admin Label – by default your SignUp module will appear with the label ‘Subscribe’ in the Divi builder. The Admin Label allows you to change this label for easy identification.
Create Beautiful Layouts with Ease and Control
Divi is a unique theme in our collection. Differing from every other Elegant Theme, Divi is built on a page builder platform that we designed and developed from the ground up.
Using Divi’s drag and drop builder you can create beautiful layouts with ease and control over every part of your site.
The builder uses three main building blocks: Sections, Rows, and Modules. Using these things in unison allows you to create a countless amount of page layouts. Elegant Themes
FeedBurner, MailChimp, AWeber and more to come…

At the moment the Subscribe / Newsletter Module supports FeedBurner, MailChimp and AWeber but more mailing list providers will be added in the next Divi theme update so watch this space.
Here are the links to the current providers:
FeedBurner – a free service offered by Google.
MailChimp – offers both a free and a premium service.
AWeber – a premium service only.
If you’re new to Divi check out my other Divi posts
An introduction to the Divi theme: An overview of the awesome Divi Builder
Save, import and export Divi layouts: Saving, importing and exporting Divi layouts
An introduction to Divi Sections: The creative power of Divi Sections
The Parallax effect in Divi Sections: Divi Sections and how to use the parallax effect like a pro
Divi Modules and how to use them: the complete guide to Divi Modules
Hope you find them useful when building your Divi website.
Pick up your copy of Divi and start building your list
The Subscribe / Newsletter Module is one of over thirty Modules supported by the Divi theme. It allows you to place a customised opt-in form anywhere on your website and link to your mailing list provider and all without touching a single line of code.
If you think that your website or blog would benefit from having a cool looking subscribe form, then sign up with Elegant Themes, download your copy of the Divi Pagebuilder theme and start building your subscriber list today.
We offer no-questions-asked refunds to all customers within 30 days of your purchase. If you are not satisfied with our product, then simply send us an email and we will refund your purchase right away. Our goal has always been to create a happy, thriving community. If you are not thrilled with the product or are not enjoying the experience, then we have no interest in forcing you to stay an unhappy member.
Nick Roach – Elegant Themes
I hope that you enjoyed the post and that I’ve shown you just how easy it is to to create and customise your subscribe and newsletter signup forms and link them to your mailing list provider.
If you have any thoughts about Divi please leave a comment and if you’d like to spread the word about this fabulous theme please use the social icons below.
Credits:
My thanks and gratitude to Elegant Themes for the graphics, video and details for the setup of the Divi Subscribe / Newsletter Module used in this post.

