I see acts of generosity, kindness and sharing every day in the Divi community.
Help with Divi site problems, tutorials showing how to create special effects and lots and lots of free templates.
But this free Divi theme Photography template from Ali Asghar of Beans Web Design still made me stop and stare.
It’s called “Click”, it’s free, it’s a complete photography website, it comes with just about the best setup instructions I’ve ever seen and it looks absolutely stunning!
In this post I’ll run through downloading, installing and configuring “Click” and I’ll point out a few WordPress specific things that you have to do along the way.
If you’re about to start a photography website, or any site that uses image galleries and portfolios, then “Click” is the template you’ve been waiting for.
My Affiliate Links Disclosure
Hi everyone. Just to let you know that many of the links on this site are my affiliate links. What that means is that if you click one of them and buy something… I get a commission. It doesn’t cost you anything extra and I only recommend things that I’ve tried and tested, so please, please, please… use my links.
Download your free Divi theme photography template

The first thing that you need to do is download the theme template and setup instructions.
To do that, head over to Beans Web Design, which is a single page website, and click the “Templates” link in the main navigation or scroll down the page until you come to the “Featured Template” section.
Click the “Download Now” button and you’ll be taken to the download page where you can download a zip file called Click-Download.zip.
This file contains everything that you need.
Once you have downloaded the file, extract all the content, which should be:
- Instructions folder – this folder contains full setup instructions and a screenshot of the menu configuration.
- Screenshots folder – this folder contains screenshots of the various pages.
- Custom CSS for Click Template.txt – all the custom CSS for the theme template.
- Divi Builder Layouts.json – all the Divi Builder layouts for the various pages.
- Divi Customizer Settings.json – the Customizer settings for the Divi theme.
- Divi Theme Options.json – the Theme Options for the Divi theme.
Installing your free Divi theme photography template

As I said at the beginning “Click comes with just about the best setup instructions I’ve ever seen”.
The instructions are set out in the “Setup Instructions for Click Template.txt” file, which you’ll find in the “Instructions” folder and to make life easier I’ve reproduced them below:
Setup instructions for “Click” Template
1 – Install Divi theme and activate
2 – In Divi theme options, go into the general tab and import the file labelled “Divi Theme Options.json”
3 – In your dashboard, go to Divi > Divi Library and import the file labelled “Divi Builder Layouts.json”
4 – Create a new page labelled “home” and using the divi builder, load a saved layout > Single page layout – Home
5 – Create a new page labelled “About” and using the divi builder, load a saved layout > Single page layout – About
6 – Create a new page labelled “Commercial Shoots” and using the divi builder, load a saved layout > Single page layout – Commercial Shoots
7 – Create a new page labelled “Corporate” and using the divi builder, load a saved layout > Single page layout – Corporate
8 – Create a new page labelled “Wedding” and using the divi builder, load a saved layout > Single page layout – Wedding
9 – Create a new page labelled “Contact” and using the divi builder, load a saved layout > Single page layout – Contact
10 – Now you can create your menus – see the menu.jpg screenshot included to see how we set up the navigation.
11 – Import the customizer settings in the theme customizer. The file to upload is labelled “Divi Customizer Settings.json”
Enjoy!
The setup instructions are pretty comprehensive, but just in case you’re new to Divi, here are a few pointers that you might find helpful:
#1 – Install the Divi theme and activate
“Click” is a Divi theme website template so you need the Divi theme by Elegant Themes to use it.
If you like the look of “Click” but don’t have the Divi theme then please feel free to use my 10% discount link at the end of this post.
Once you’ve installed and activated Divi, a Divi menu item will appear at the bottom left in your WordPress dashboard.
#2 – Import the Divi Theme Options
From your WordPress dashboard go to Divi > Theme Options and select the General tab.
Click the two arrows icon at the far right of the purple menu bar and the Export / Import popup will appear.
Click Import, choose the file labelled “Divi Theme Options.json” and click the blue “Import Divi Theme Options” button.
#3 – Import the Divi Builder Layouts to your Divi Library
From your WordPress dashboard go to Divi > Divi Library and click the Import & Export button at the top left, which will open the Export / Import popup.
Click the Import button, choose the file labelled “Divi Builder Layouts.json” and click the blue Import Divi Builder Layouts button.
Click (light) is also available…
I’ve just heard from the developer of “Click”, that “Click – light”, a light version of “Click”, is now available.
I’ll get out a full post on it soon but in the meantime you may want to take a look at the “Click – light” demo site.
#4, 5, 6, 7, 8 and 9 – Create your Pages using the Divi Builder
Now that you have the Divi Builder Layouts in your Divi Library, you can use them to create your pages.
There are 6 pages to create and they are titled: Home, About, Commercial Shoots, Corporate, Weddings and Contact.
The Portfolio link in the menu is only a Custom Link, not a real page.
To create a new page: from your WordPress dashboard go to Pages > Add New and the New Page interface will appear.
Add the page title and then click the big purple “Use The Divi Builder” button, which will open the Divi Builder interface with a single Section as content.
On the purple menu bar, click the “Load From Library” menu item, which will open the “Load Layout” popup.
From the popup choose the “Add From Library” tab and find the page that you want to upload.
Make sure that the “Replace the existing content with loaded layout” checkbox is ticked and then click the blue “Load” button.
The single Section of content will now be replaced by the template you have chosen so now click the “Save” button and the page is created.
Create all your pages as above and selecting the appropriate template: for example for the Homepage you would choose “Single page layout – Home”.
#10 – Create your menu and menu items
I always think that Menus are more about WordPress than the theme you’re using, so I’ve covered the menu setup in the “WordPress specific things” section below.
#11 – Import the Divi theme Customizer settings
From your WordPress dashboard go to Divi > Theme Customizer.
Click the two arrows icon at the top of the Customizer options and the Export / Import popup will appear.
Click Import, choose the file labelled “Divi Customizer Settings.json” and click the blue “Import Divi Customizer Settings” button.
#12 – Add Custom CSS for Click to the Divi Theme Options
Although not mentioned in the setup instructions, you should add the custom CSS for “Click” to the Divi Theme Options.
To do this from your WordPress dashboard go to Divi > Theme Options and select the General Tab.
Scroll down to the bottom of the page to the Custom CSS box and paste the contents of the “Custom CSS for Click Template.txt” file into this box and click the green “Save Changes” button.
A few WordPress specific things that you have to do
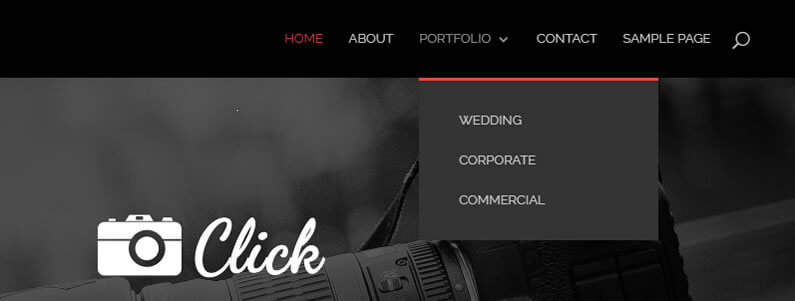
By now your site should be looking pretty much like the “Click” demo site, but there are still a couple of WordPress specific things that you have to do.
Define your Homepage and Blog page
If you’ve used a new WordPress install to create your site, you will notice that WordPress has created a Sample page and a Sample post.
You can delete both of these and then you need to define your Front page and Posts page.
To do this: from your WordPress dashboard go to Settings > Reading.
Under “Front page displays” select “A static page” and choose “Home” from the dropdown box.
For “Posts page” select the page that you want to display your posts. Note! – if you want a posts page you will have to create a page and call it Blog, Articles or whatever you want.
Build your Menu
To create your menu: from your WordPress dashboard go to Appearance > Menus and set up the menu as shown in the “menu.jpg” screenshot, which is included in the Instructions folder.
Note that the Commercial shoots, Corporate and Weddings pages are sub-menu items and that the Portfolio page is a Custom Link not a real page.
To create a sub-menu item, drag the item to the right as shown in the “menu.jpg” screenshot.
To create the Portfolio page Custom Link, in the Menus area click “Custom Links”, add “#” in the URL field and add “Portfolio” in the “Link Text” field and click “Add To Menu”.
Adding your own images to the Divi Gallery Modules
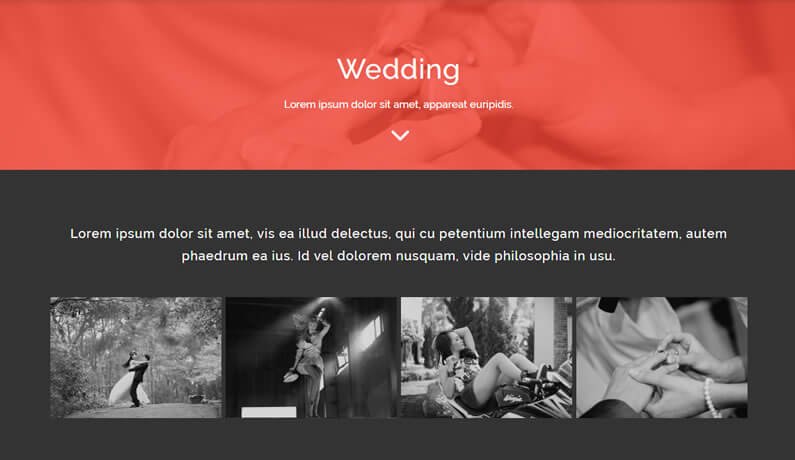
Click makes extensive use of the Divi Gallery Module to display images.
The Gallery Modules are configured but you have to upload your own images to the WordPress Media Library and then add them to each Gallery Module.
To add your own images to a particular Gallery Module: open the page containing the Gallery Module, open the Module’s Settings panel and click the “Update Gallery” button.
Choose “Add to Gallery” select your images and click “Add to Gallery” and then “Update Gallery”.
Finally click the “Save and Exit” button on the Gallery Module’s Settings page.
A few of Click’s hidden gems to look out for
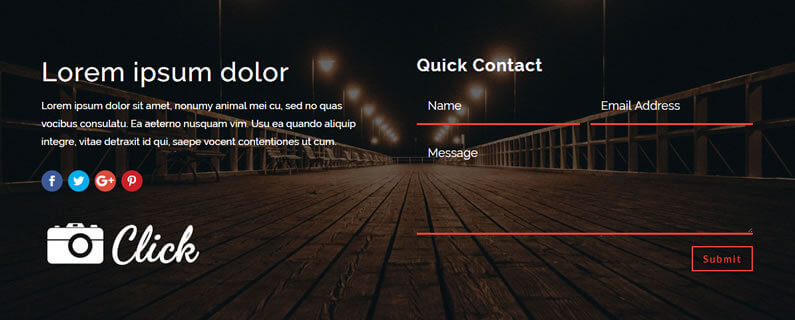
The more you look at “Click”, the more clever touches and refinements you see.
Classic combination of colours, clean readable font pairings, generous use of whitespace, eye-caching rollover effects and lots of clever styling details.
I could write a whole post pointing out Click’s hidden gems, but here are my top three:
The gorgeous contact form
All of the contact forms on “Click” are created using Divi’s Contact Form Module, styled with a touch of custom CSS.
And what a difference that touch of custom CSS makes.
The transparent contact forms is one of the many features that I’ll be stealing for my own sites.
The dropdown sub menu
“Click’s” dropdown menu looks pretty good but it looks even better for the touch of animation that it’s been given.
Not too much, not too little, just enough to add interest and keep your visitors’ attention.
Clear annotation for all the Divi Page Builder elements
My final hidden gem is not very sexy, but it is a reminder of something that we should all do when we build our Divi pages.
If you look at any of “Click’s” pages in the Divi Builder backend editor you’ll notice that all the Divi Builder elements are labelled.
It may seem like a bit of a pain at the time but you’ll be thankful when you visit the page twelve months later.
Create a stunning photography website with the “Click” free Divi theme website template
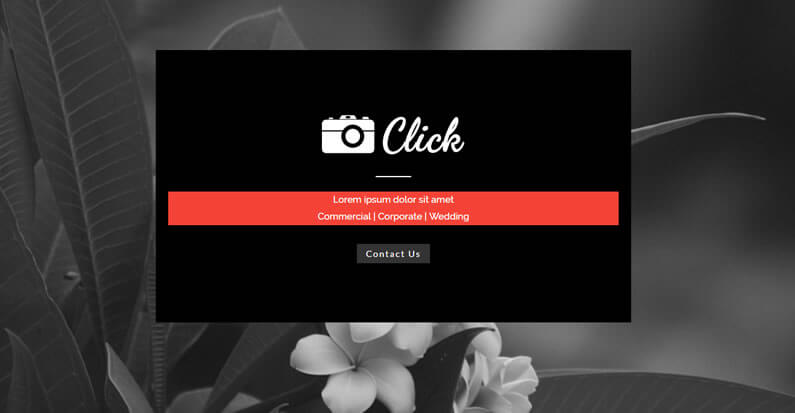
You’ve probably guessed from this post that I’m rather taken with “Click”.
It may be free but it’s as good, if not better, than many of the premium templates and themes that I’ve looked at.
It looks good, it’s well put together and as I’ve pointed out above… it’s absolutely full of hidden gems.
Link to “Click’s” demo site
“Click” was created by Ali Asghar of Beans Web Design and you can take a closer look at the “Click” demo site.
Permanent offer for 10% off Divi / Elegant Themes new memberships
If you’d like to use “Click” for your next photography website, but you’re not a Divi theme user, then please feel free to use my permanent 10% off discount below.
This deal applies to the new memberships Developer license only.

Get 10% Off New Memberships!
This is a permanent offer for new memberships (Developer license only) so even if you missed all the other Elegant Themes “time limited” deals… this one will always be waiting for you.
Credits:
My thanks and gratitude to:
Ali Asghar for his fabulous Divi theme photography website template.
Elegant Themes for offering this generous 10% off deal.

